Within this section of CRM, you will be able to view and manage your leads. When you pull up a lead, you will be able to add notes, send them an e-mail, view their Saved Searches, and more.
Breakdown
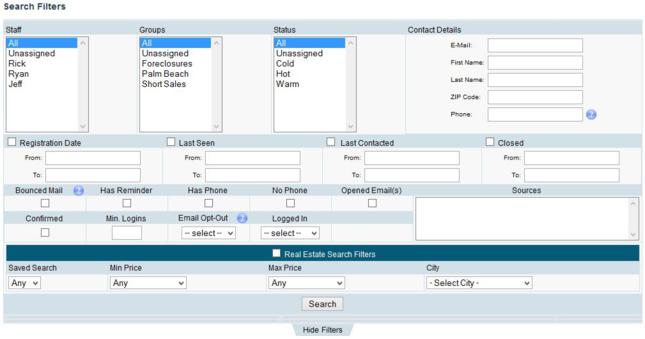
Search Filters
You can use these Search Filters to view a specific subset of leads and can also send a Mailblast to this particular subset of leads if you would like to do so.
Search Results
When you use the Search Filters above to view a specific subset of leads, the results will show up in this grid.
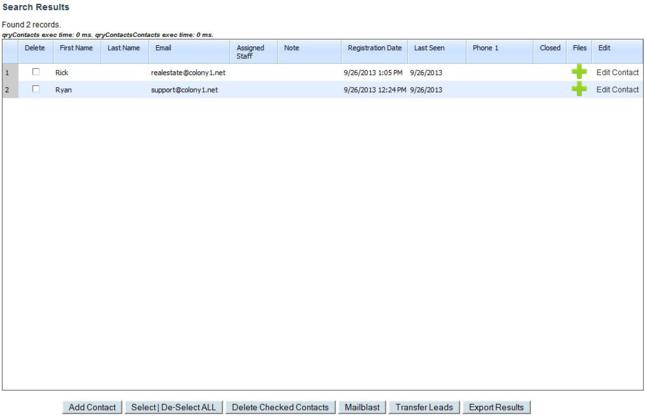
Below this grid, you will see a few buttons.
You can double-click on any lead in the grid to view and/or edit their contact information, send them an e-mail, view their Saved Searches, etc... See below for more information on each tab.
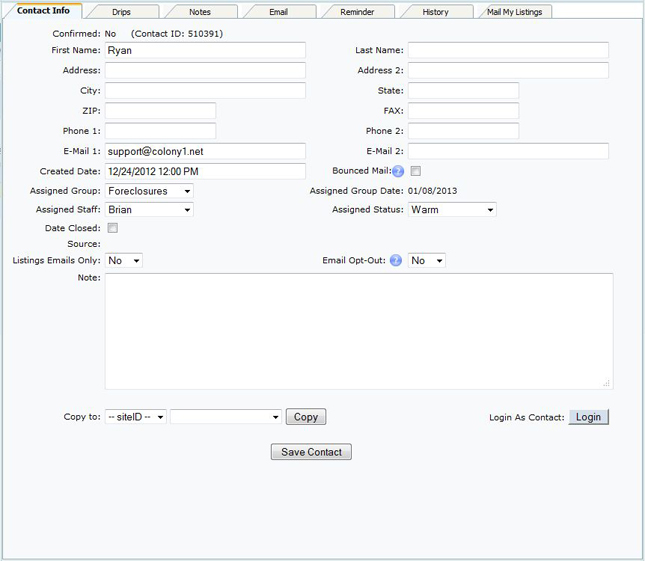 Contact Info
 - On this tab, you will see the leads contact information as well as some other important information, such as the Staff Member and Contact Group in which they are assigned to, etc...
Drips - On this tab, you will see all Mail Drips that have been queued for your lead. You will also see the status of each Mail Drip in the queue, along with any possible actions that can be taken (if applicable). Please see below for a breakdown of all possible Status scenario's.

Scenario # 1
- Drip Row has a “Status” of Active and a “Next Send” date sometime in the future. This is an active drip that is scheduled to be sent in the future.
- Available Action: You can turn off the drip for the contact by clicking on the ”Disable” button under the “Action” column, before the “Next Send” date.
Scenario # 2
- Drip Row has a “Status” of Done. This is a one-time drip that has already been sent out to the contact or a recurring drip that has reached its Quantity limit as defined in the Drip Settings, and has been de-activated.
- Available Action: There is no action that can be taken here, as the drip cannot be resumed.
Scenario # 3
- Drip Row has a “Status” of Paused. The drip was de-activated at some point due to one of the following changes to this contact’s record:
- Marked for Bounced Mail
- Email Opt-Out status set to Yes
- Assigned to a new Staff, Group, or Status.
When the “Bounced Mail” box is unchecked for this contact or their “Email Opt-Out” status is set to No, the system will not automatically send any drips that have a “Next Send” date and time more than 3 days old. This will ensure that the contact does not receive several drips at once.
When changes are made to the Staff Assignment, Group Assignment, or Status Assignment, the system will determine new drip eligibility. In doing so, the system will not automatically send any new non-listings drips that have a “Next Send” date and time more than 3 days old (Note, this only applies to drips that were setup / scheduled based on “Date Created”). This will ensure that the contact does not receive several drips at once.
- Available Action: You can choose to manually re-activate the drip by clicking on the “Resume” button. The drip will then continue with its normal schedule as defined in the Drip Settings.
Scenario # 4
- Drip Row has a “Status” of OptOut. This is a non-listings drip that was de-activated at some point due to the contact opting out of this particular drip.
- Available Action: You can choose to opt the contact back into this drip by clicking on the “Reset” button.
Scenario # 5
- Drip Row has a “Status” of OFF. This is either of the following.
- This is a non-listings drip that was de-activated at some point due to the contact opting out of ALL non-listings drips. However, the contact continues to receive “Listings Only” drips.
- Available Action: There is no action that can be taken here and the Action column will indicate “[ListingsOnly]”.
- The drip was de-activated at some point due to this contact being marked for Bounced Mail or their Email Opt-Out status was set to Yes.
- Available Action: There is no action that can be taken here and the Action column will indicate “[Bounced / Opt Out]”. The drip cannot be resumed.
- Note: The Status and Available Action for this drip will change accordingly if/when the contact is no longer marked for Bounced Mail and/or their Email Opt-Out status is set to No.
Notes - On this tab, you will see all notes related to your lead. These notes will include automatic system generated notes as well as notes that you have manually entered for your lead. You can also add additional notes to your lead using the "ADD NOTE" link under this tab.

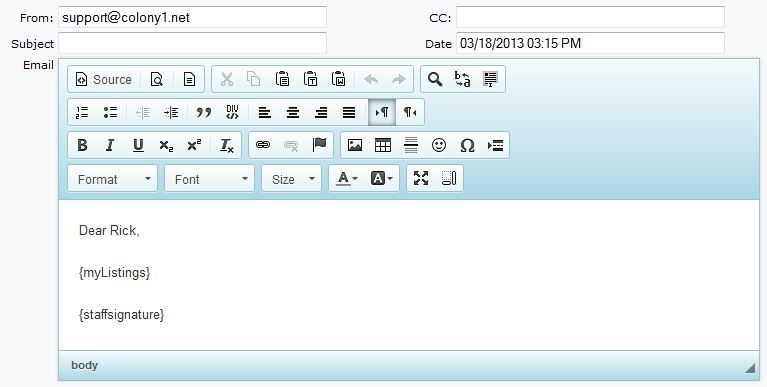
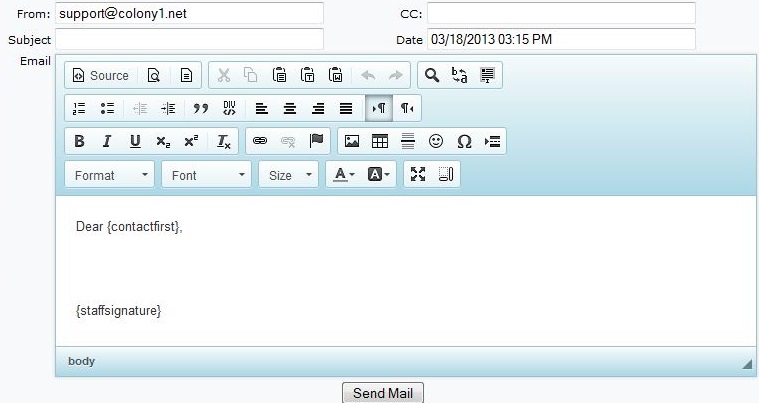
Email - On this tab, you will be able to send an e-mail directly to your lead. You can also use predefined Tokens to automatically populate content in your e-mail, such as the first and last name of the lead. This will allow your e-mail to be personalized and will also save you the time of having to type out full information.
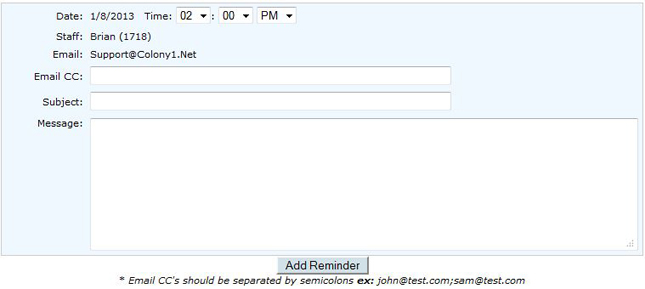
Reminder - On this tab, you will be able to setup various reminders for your lead. For example, you can setup a reminder for the next time that you need to follow-up with your lead. You will receive an e-mail notification an hour before the scheduled reminder time.
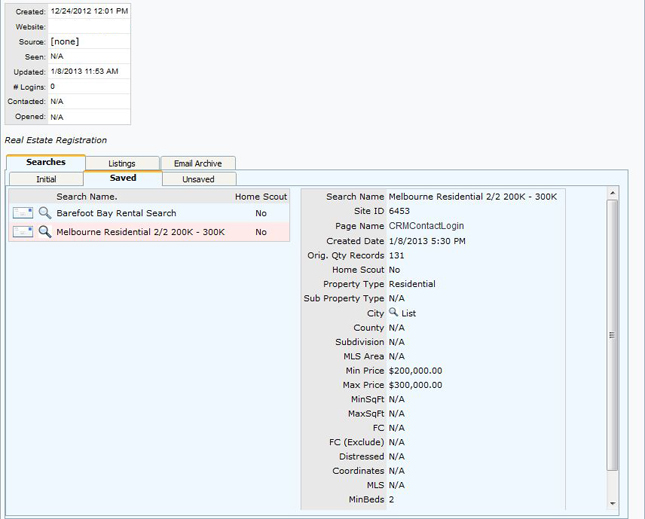
History - On this tab, you will see information such as when your lead was created in CRM, the last time in which they logged into their account on your website, etc... In addition, you will be able to view their searches and any particular listings that they may have saved, as well as the e-mails that have been sent to them via CRM.
Mail My Listings - On this tab, you will be able to select your personal listings or those from your Brokerage, and e-mail these selected listings to your lead.